
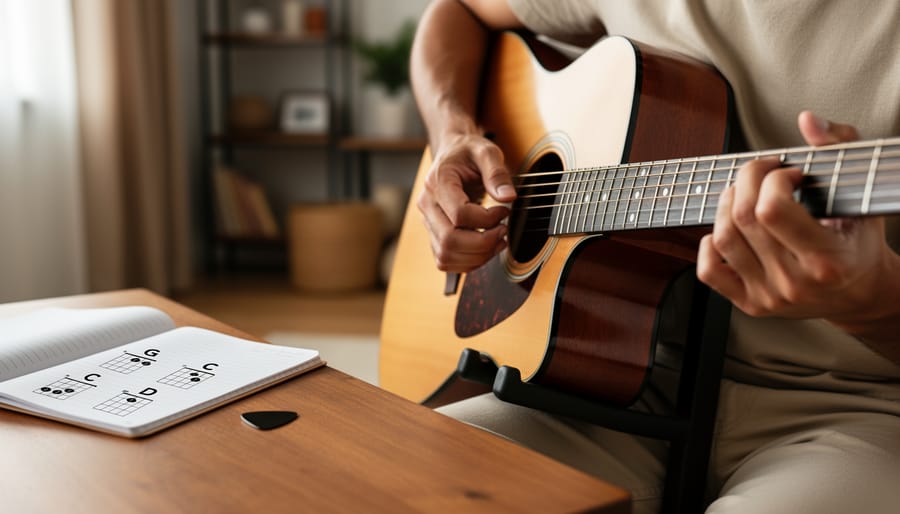
How to Learn Acoustic Guitar Rock Classics: A Beginner’s Step-by-Step Method
Learning classic rock songs on acoustic guitar takes just three essentials: a properly tuned six-string, a handful of foundational chord shapes, and a straightforward practice routine that breaks down iconic riffs into manageable pieces. Most beginners can start playing recognizable parts of songs like “Knockin’ on Heaven’s Door” or “Wish You Were Here” within their first week, even if they’ve never touched a guitar before.
Here’s what nobody tells you when you’re starting out: those electric guitar solos and power chords you hear on classic rock albums translate beautifully to acoustic. The raw, unplugged sound actually helps you hear what you’re doing right and, more importantly, what needs work. I’ve spent decades playing both acoustic and electric, and I always come back to the acoustic when I’m learning something new because there’s nowhere to hide behind distortion or effects.
The challenge isn’t talent or natural ability. It’s knowing where to begin when you’re staring at tabs that look like hieroglyphics and YouTube tutorials that skip over the parts you actually need explained. You need a clear path from holding the guitar correctly to strumming your first complete song, with checkpoints along the way to make sure you’re building good habits instead of practicing mistakes.
This guide walks you through the complete process, from choosing the right guitar and getting it set up properly, to mastering the specific techniques that make classic rock songs sound authentic on acoustic. You’ll learn how to avoid the most common beginner mistakes, how to know when you’re ready to move forward, and what to do when your fingers hurt or a chord sounds dead.
What You’ll Need to Get Started
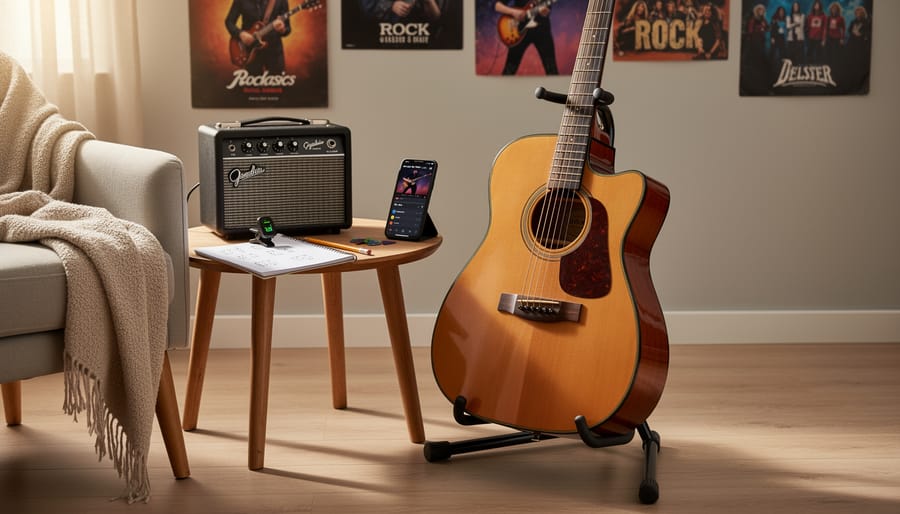
Choosing the Right Guitar for Rock Songs
Steel-string acoustic guitars are your best bet for rock classics. The bright, punchy tone of steel strings captures that rock energy much better than the mellow sound of nylon strings, which are designed for classical and flamenco styles. When I’m teaching students who want to tackle rock songs, I always steer them toward steel-string models.
Body style matters too. Dreadnought guitars, those big, square-shouldered acoustics you see everywhere, produce the volume and bass response that rock music demands. They project well and give you that full, powerful sound when you’re strumming power chords or driving rhythms. Concert and auditorium body styles work fine too, especially if you have a smaller frame, but they produce a slightly thinner tone.
Here’s the practical reality: you don’t need an expensive guitar to start. A mid-range steel-string dreadnought from brands like Yamaha, Fender, or Epiphone will serve you well. The key is making sure it stays in tune, the action isn’t painfully high, and it feels comfortable in your hands. A guitar that’s easy to play matters more than fancy wood or premium electronics when you’re learning rock classics.
Optional Tools That Make Practice Easier
While you can learn rock classics with just your guitar, a few tools can speed up your progress and make practice more enjoyable. A basic recording device, your phone works perfectly, lets you hear what you actually sound like versus what you think you sound like. Trust me, this is eye-opening.
A loop pedal is fantastic for practicing lead parts over rhythm sections you’ve recorded yourself. You become your own backing band.
Online platforms like YouTube or guitar lesson sites offer visual demonstrations that help decode tricky techniques. Seeing how someone positions their fingers beats guessing from a tab sheet.
A comfortable guitar strap, even for sitting practice, helps maintain good posture during longer sessions. And a simple music stand keeps your phone or tablet at eye level, preventing that hunched-over-the-screen neck strain we all know too well.
Essential Safety and Setup Tips
Before you dive into learning those rock classics, let’s talk about something that might sound boring but will save you a world of hurt later, literally. I’ve seen too many eager beginners develop hand pain or shoulder tension that could’ve been avoided with a few simple setup tweaks. Trust me, you can’t practice effectively if your body is fighting you.
Start with your sitting position. Plant both feet flat on the floor and sit toward the front edge of your chair, not slouched back into it. The guitar should rest on your right leg (if you’re right-handed), with the body tilted slightly up so you can see the fretboard without hunching over. Your back should be straight but not rigid, and your shoulders relaxed and level. Many players unconsciously hike up their strumming shoulder, which creates tension that radiates down your arm during longer practice sessions.
Your fretting hand needs special attention. Your thumb should sit behind the neck, roughly opposite your middle finger, not wrapped over the top like you’re gripping a baseball bat. Keep your wrist fairly straight, imagine a line running from your forearm through your wrist without a sharp angle. When you press down strings, use your fingertips, not the pads, and position your fingers close to the frets (but not on them) to minimize the pressure needed. Check out this guide on correct guitar posture for detailed visual references that’ll help you nail these fundamentals.
Set up your practice space with intention. Good lighting prevents eye strain, and positioning yourself away from distractions helps maintain focus. Keep your guitar on a stand within easy reach so you’re more likely to practice regularly, and adjust your chair height so the guitar sits comfortably without you having to contort your body.
Finally, take breaks. Practice in 20-30 minute sessions when you’re starting out, giving your hands and mind time to rest. Your fingers will be sore at first, that’s normal, but sharp pain is your body telling you to stop and check your technique.

Step-by-Step Process for Learning Rock Classics
Step 1: Choose Your First Rock Classic Wisely
Picking your first rock classic isn’t about choosing the coolest song you know, it’s about setting yourself up to actually finish what you start. I learned this the hard way after spending three frustrated weeks trying to nail “Stairway to Heaven” as my second-ever song. Look for tracks with three to four open chords max, a tempo you can hum along to without racing, and a verse-chorus structure you can recognize easily.
Here are five rock classics that hit that sweet spot:
- Knockin’ on Heaven’s Door (Bob Dylan)Just four chords (G, D, Am, C), slow tempo, repetitive structure. You’ll sound good after one practice session.
- Horse with No Name (America)Only two chords the entire song (Em and D6/9), making it perfect for building your chord-change confidence.
- Bad Moon Rising (Creedence Clearwater Revival)Three chords (D, A, G), upbeat but manageable tempo, and that iconic rhythm feels great on acoustic.
- Leaving on a Jet Plane (John Denver)Classic rock-adjacent with G, C, and D chords, plus a strumming pattern you can simplify at first.
- Good Riddance (Green Day)Uses G, Cadd9, D, and Em with a fingerpicking pattern you can swap for strumming initially.
Start with whichever song genuinely excites you from this list. Your enthusiasm will carry you through the awkward early repetitions when your fingers feel like they’re made of wood.
Step 2: Master the Core Chord Progressions
Once you’ve chosen your song, forget about playing it at full speed for now. Your first mission is to nail the chord progressions, the backbone of any rock classic.
Start by writing out the chords in order. Most rock songs follow predictable patterns that repeat throughout: verse, chorus, bridge. You might find you’re only dealing with four or five chords total. That’s good news.
Now here’s my approach, and it’s made all the difference for countless students: practice the transitions between chords, not the chords themselves. You can probably form a G chord cleanly. The hard part? Moving from G to C and back again without that awkward pause.
I always tell my students that chord changes are like learning to type. When you first started typing, you hunted and pecked for each letter. But after enough repetition, your fingers just knew where to go. Same principle here. Your muscle memory needs repetition, not speed.
Practice each chord change in isolation. G to C. Twenty times. Slowly. Don’t strum yet, just form the shapes and move between them. When your fingers start finding their positions without you consciously directing each one, you’re building real muscle memory.
The tempo will come. Right now, accuracy is everything.
Step 3: Learn the Strumming Pattern
Once you’ve got the chord changes smooth, it’s time to nail the rhythm, the heartbeat of any rock song. Listen to the track several times and tap your foot to the beat. Don’t try to catch every nuance yet; just feel the basic pulse.
Start dead simple: play each chord with all downstrokes, one strum per beat. It’ll sound stiff at first, and that’s fine. You’re building the framework. Set your metronome to 60 BPM and strum evenly on every click. When that feels comfortable for the entire song, you’ve got your foundation.
Now add the pattern. Most rock classics follow a down-up-down-up pattern, with certain strums accented or skipped. Listen closely to where the original guitarist emphasizes the beat, that’s usually on beats one and three. Practice the pattern on a single chord first, then gradually apply it to your chord progression.
Your wrist should stay loose and swing like a pendulum, not rigid like you’re hammering nails. If your forearm starts burning, you’re working too hard. The strumming motion comes from the wrist, with your arm just along for the ride.

Step 4: Work on Fingerpicking (If Applicable)
Not every rock classic requires fingerpicking, but when it does, you’re in for a treat. Songs like “The Boxer” or “Blackbird” showcase how powerful acoustic fingerpicking can be in rock music.
Start by identifying which fingers pluck which strings. Your thumb handles the bass notes (typically the low E, A, and D strings), while your index, middle, and ring fingers work the higher strings. Ignore the pinky, it’s basically useless for beginners.
Here’s the secret: slow it down to ridiculous speeds. I mean quarter speed or even slower. If the song feels like you’re playing it underwater, you’re doing it right. At this pace, your brain can actually process which finger goes where without panic.
Practice just four measures repeatedly until your fingers move automatically. Then, and only then, nudge the speed up by tiny increments. Rushing this stage guarantees you’ll develop sloppy habits that’ll haunt you later. Trust me, I’ve seen it happen countless times with my students.
Step 5: Add Dynamics and Expression
Once you can play through your rock classic cleanly, it’s time to make it *sound* like rock. This is where you transform mechanical playing into music that has soul.
Start by listening to the original recording with fresh ears. Notice where the guitarist gets louder during the chorus, or pulls back during verses. Rock classics thrive on contrast, the quiet parts make the loud parts hit harder.
Practice playing the same chord progression at three different volumes: soft, medium, and full power. You’ll discover that soft doesn’t mean timid, it means controlled intensity. When you crash into that chorus, the dynamic leap creates excitement.
Here’s Joe’s trick: imagine you’re telling a story with your guitar. Some sentences are whispers, some are shouts. The notes stay the same, but the emotion changes everything. That’s what separates someone playing notes from someone playing music.
Step 6: Practice with the Recording
Playing along with the original recording transforms your practice from isolated exercises into a genuine musical experience. Start by simply listening to the song a few times while following along with your chord chart, notice where the guitar sits in the mix and how it locks in with the bass and drums.
When you’re ready to play, begin with just the rhythm. Don’t worry if you can’t keep up at first; pause the track, practice the tricky section, then try again. I remember struggling to stay with “Knockin’ on Heaven’s Door” until I stopped fighting the recording and started listening to the bass line as my anchor.
Use YouTube’s playback speed feature to slow songs down to 75% or 85% if needed. As you play, focus on matching the energy and attack of the original guitarist. You’ll quickly discover where your timing drifts or where you’re rushing chord changes, the recording becomes your most honest teacher.
Step 7: Build Speed Gradually
Once you can play the song correctly at a slower tempo, it’s time to gradually build up speed using what musicians call the 3×3 metronome tempo method. Here’s how it works: set your metronome to about 50-60% of the song’s actual tempo and play through the entire piece cleanly three times in a row without mistakes. If you stumble, drop back a few beats per minute and try again.
When you’ve nailed three perfect run-throughs, bump the tempo up by just 5 BPM. That’s it. Five beats. It sounds almost too small to matter, but trust me, this incremental approach builds speed without letting sloppiness creep into your muscle memory. I’ve seen students try to jump from 60 BPM straight to full speed and crash every time. Your fingers need time to adjust to each new tempo.
Keep repeating this cycle. Three clean passes, then up 5 BPM. Some days you’ll fly through several increases. Other days you might camp out at one tempo for a week, and that’s completely normal. The key is never sacrificing accuracy for speed.
How to Know You’re Ready to Move On
Knowing when you’ve truly mastered a song isn’t about perfection, it’s about demonstrating consistent competence across multiple practice sessions. Many beginners move on too quickly, leaving gaps in their foundation that make the next song harder than it should be.
Here are the concrete checkpoints that tell you you’re ready for your next challenge. First, you should be able to play the entire song from memory without looking at tabs or chord charts. If you’re still glancing down every few bars, you haven’t internalized the structure yet. Give yourself another week of daily practice.
Second, maintain a consistent tempo throughout the song. Use a metronome or play along with the recording, if you’re speeding up during easy sections and slowing down for transitions, you’re not quite there. The rhythm should feel steady and natural, not like you’re racing through the simple parts and panicking through the hard ones.
Third, your chord transitions should sound clean. There shouldn’t be long pauses between chords, buzzing strings, or muted notes. Each chord should ring out clearly the moment your fingers land. Record yourself, your ears will catch issues your fingers miss.
Finally, you should be able to play through the song three times in a row without stopping or making significant mistakes. This isn’t a one-time test. Come back the next day and do it again. If you can nail it three days in a row, you’ve built real muscle memory.
When you hit all these markers, celebrate that achievement. You’ve earned the right to tackle something new, and you’ll bring all these skills forward to make the next song easier.
Common Challenges and How to Overcome Them
Learning rock classics on acoustic guitar comes with predictable hurdles that trip up nearly every beginner. The good news? These challenges aren’t signs you lack talent, they’re normal stages every guitarist works through.
Barre Chords Feel Impossible
When you first encounter an F major or B minor barre chord, your hand will cramp and the notes will buzz. That’s universal. The mistake most beginners make is trying to muscle through it with brute force.
Instead, start by barring just the top three strings with your index finger while forming simple shapes with your other fingers. Practice this for 30 seconds at a time, then shake out your hand. Build endurance gradually over weeks, not days. Position your thumb directly behind your index finger on the back of the neck for leverage, you’re creating a clamp, not just pressing down.
I spent two months where my barre chords sounded terrible. Then one Tuesday morning, they just clicked. Your breakthrough is coming.
Chord Changes Lag Behind the Beat
When the song moves from G to C and your fingers scramble while the music keeps going, frustration builds fast. The solution isn’t to practice the chord change itself, it’s to practice the transition motion.
Strum G once, then move to C position without strumming. Repeat this 20 times while watching TV. Your fingers are learning the shortest path between shapes. Once the movement becomes automatic, add the rhythm back in.
Strumming Patterns Sound Stiff
Rock songs have groove and feel, but your strumming sounds mechanical. You’re probably focusing too hard on getting the pattern exactly right. Try this: tap your foot to the recording and just strum down on every beat, ignoring the actual pattern. Feel the pulse. Then gradually add upstrokes between beats where they naturally want to happen. Let the rhythm settle into your body before your brain takes over.
Motivation Crashes After Two Weeks
Progress feels slow, and you wonder if you’re improving at all. Record yourself weekly. When you think you’re stuck, compare this week’s recording to three weeks ago. The evidence of progress exists even when it doesn’t feel like it in the moment.
Frequently Asked Questions
How long does it really take to learn a rock classic on acoustic guitar?
For a simple three-chord song, you can have a rough version down in a week or two of daily practice. More complex songs with barre chords or intricate strumming might take a month or longer, but that’s perfectly normal.
Should I learn from tabs or sheet music?
Tabs are usually easier for beginners since they show you exactly where to put your fingers without needing to read standard notation. Once you’re comfortable with tabs, you can explore sheet music if you want to understand the underlying music theory, but it’s not required for learning rock classics.
Can I really play electric rock songs on acoustic guitar?
Absolutely. Most rock classics translate beautifully to acoustic, though you’ll need to adapt heavily distorted parts and power chords into fuller chord voicings. Songs like “Wish You Were Here” and “Blackbird” started on acoustic anyway, and many heavy electric riffs sound surprisingly good stripped down.
How much should I practice each day?
Quality beats quantity. Twenty focused minutes is better than an unfocused hour. Aim for 20-30 minutes daily when starting out, and you’ll see steady progress without burning out or hurting your fingers.
What if my hands are too small for certain chords?
Hand size matters less than you think. I’ve seen kids with tiny hands nail barre chords while grown adults struggle. It’s about building finger strength and finding the right thumb position behind the neck. Keep at it and your hands will adapt.
Do I need to learn music theory to play rock classics?
Not at all. Many legendary rock guitarists started by learning songs by ear and feel. Theory can help you understand why things work and speed up learning later, but you can play plenty of great songs without knowing a single scale name.
These questions come up constantly in my lessons, and they’re all rooted in the same worry: am I doing this right? Here’s the truth, if you’re picking up the guitar regularly and working through songs that excite you, you’re doing it exactly right. There’s no secret shortcut or perfect method that works for everyone.
Some folks obsess over whether they should use a pick or fingers, whether they need an expensive guitar, or if they’re too old to start. None of that matters as much as simply showing up and playing. The guitar doesn’t care about your age, your gear, or whether you learned the “proper” way. It only responds to the time you put in and the passion you bring.
Learning acoustic guitar rock classics is absolutely within your reach. Every legendary guitarist you admire started exactly where you are right now, struggling with chord changes, fumbling through strumming patterns, and wondering if they’d ever get it right. The difference between those who made it and those who didn’t? They kept showing up and practicing.
I remember sitting in my bedroom at sixteen, trying to nail “Satisfaction” by the Stones. My fingers hurt, my timing was off, and I wanted to quit a dozen times. But something kept me going, the pure joy of hearing those iconic riffs come to life under my own fingers. That feeling never gets old, even after decades of playing.
The rock classics you’ve learned through this process aren’t just songs. They’re building blocks. Every chord progression you’ve mastered, every strumming pattern you’ve internalized, every barre chord you’ve conquered, these form the foundation for everything else you’ll learn on guitar. You’re developing muscle memory, training your ear, and building the confidence that comes from finishing what you started.
Keep your practice consistent, even if it’s just fifteen minutes a day. Some days you’ll feel like a rock star, other days like you’re starting from scratch. That’s normal. The guitar rewards patience and persistence above raw talent every single time.
If you want structured guidance to keep this momentum going, check out my modules and lessons designed specifically for players at your stage. You’ve already proven you can do this.

Your Feedback